In this article we’ll describe how to configure Scheduled Job Notifications.
Configure Job Notification Time
Open the Main Menu and scroll down to Configure.
Click Settings.
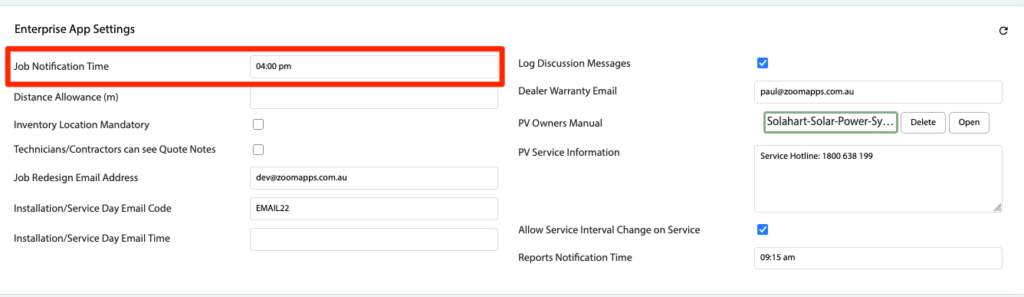
Scroll down to Enterprise App Settings.
Input a Job Notification Time. This is the time of day to trigger Scheduled Job Notifications. NOTE: Set this to blank to disable all Scheduled Job Notifications.
Configure a Scheduled Job Notification
Open the Main Menu and scroll down to Configure.
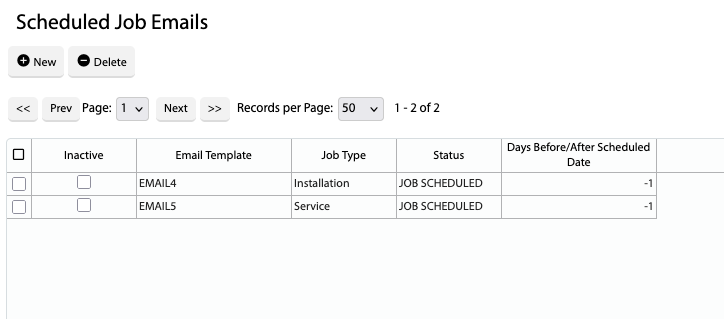
Click Scheduled Job Notifications.
Click New and input the following fields:
Inactive – Tick this to make the notification inactive
SMS Template – Optional. Select an SMS Template to send. If the Customer does not have a mobile number, the system will send the Email Template instead
Email Template – Select an email template to send
Job Type – Optional. Installation/Service/Emergency/Warranty
Status – Optional. Only trigger the email for a certain Job Status.
Days Before/After Scheduled Date – Days before (use a negative number) or days after the Job Scheduled Date to send the notification.
NOTE: EMAIL4 & EMAIL5 have been converted to Scheduled Job Notifications (so you can disable these by clicking Inactive)