In this article we’ll describe how to configure Inventory Locations and Transfer Inventory. Inventory Locations can be used to group stock (ie: Storing stock in a warehouse, then transferring it to a truck before installing it on a job).
Location has been added to the following pages/reports:
Inventory Journal
Inventory List
Picking List
Stocktake Journal
Stock Ordering Report
Inventory Report
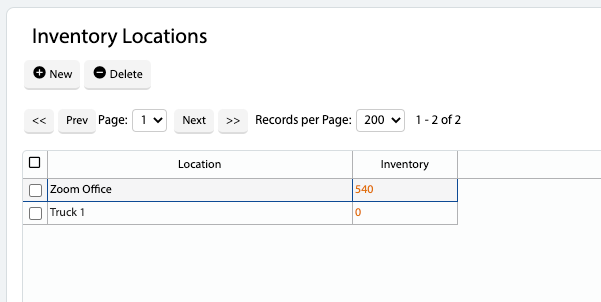
Configure Inventory Locations
Open the Main Menu and scroll down to CONFIGURE
Click Inventory Locations
Click New and fill out the Location field. This is the name of the location
A total count of the inventory for that location is also displayed
Make Inventory Location Mandatory
Open the Main Menu and scroll down to CONFIGURE
Click Settings
Scroll down to Enterprise App Settings
Click Inventory Location Mandatory. When a Picking Inventory or posting an Inventory Journal, the Location field will now be mandatory
Transfer Inventory Between Locations
Open the Main Menu and scroll down to REPORTS
Click Stock Ordering Report
Select a Date Range and Job Status to find stock required for jobs
Select the Location you want to transfer the stock “from”
Click OK to run the report
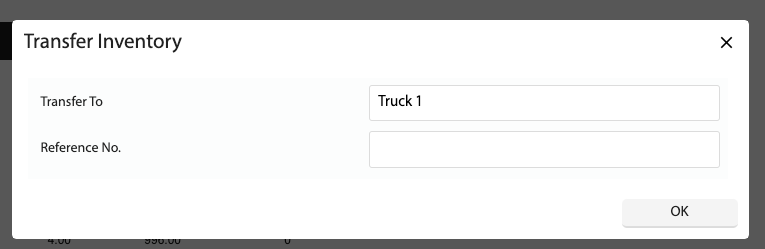
Click the Transfer Inventory button and select a Location you want to transfer the stock “to”
Add an optional Reference No. and click OK
The adjustments will be added to the Inventory Journal to be applied
Transfer Product Inventory Between Locations
Open the Main Menu and scroll down to CONFIGURE
Click Products
Find the Product you wish to transfer and click the Inventory link (at the top right of the screen)
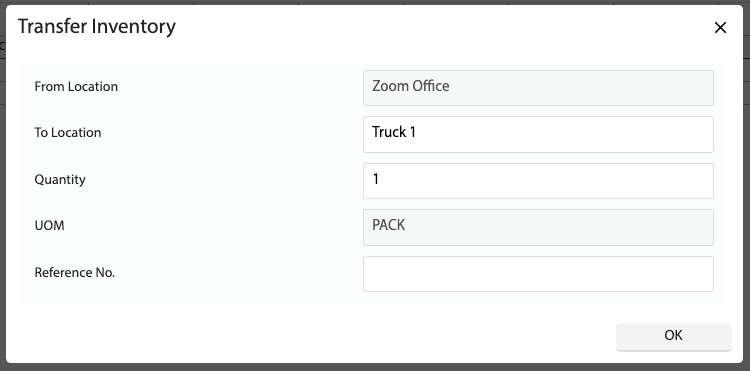
Select an inventory line and click Transfer Inventory
Input the following:
To Location – This is where the inventory will be transferred “to”
Quantity – Quantity to transfer
Reference No. – Optional
Click OK
The adjustments will be added to the Inventory Journal to be applied