How Can We Help?
![]() Added in Version 0.39
Added in Version 0.39
Overview
- In this article we’ll describe how to configure Scheduled Job Notifications.
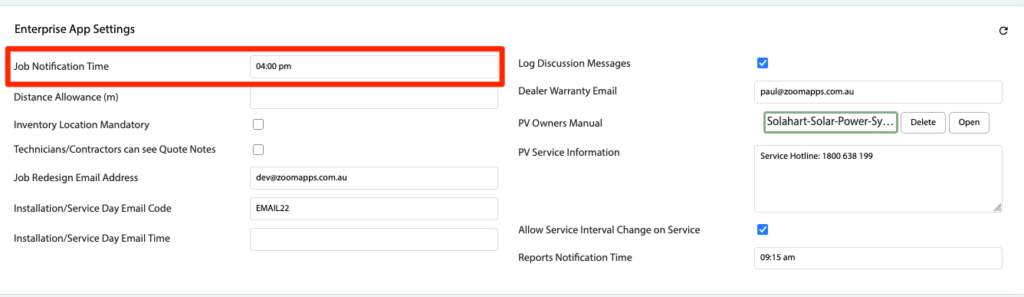
Configure Job Notification Time
- Open the Main Menu and scroll down to Configure.
- Click Settings.
- Scroll down to Enterprise App Settings.
- Input a Job Notification Time. This is the time of day to trigger Scheduled Job Notifications. NOTE: Set this to blank to disable all Scheduled Job Notifications.
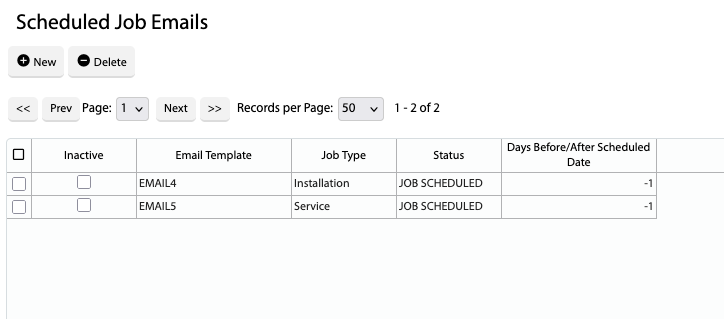
Configure a Scheduled Job Notification
- Open the Main Menu and scroll down to Configure.
- Click Scheduled Job Notifications.
- Click New and input the following fields:
- Inactive – Tick this to make the notification inactive
- SMS Template – Optional. Select an SMS Template to send. If the Customer does not have a mobile number, the system will send the Email Template instead
- Email Template – Select an email template to send
- Job Type – Optional. Installation/Service/Emergency/Warranty
- Status – Optional. Only trigger the email for a certain Job Status.
- Days Before/After Scheduled Date – Days before (use a negative number) or days after the Job Scheduled Date to send the notification.
NOTE: EMAIL4 & EMAIL5 have been converted to Scheduled Job Notifications (so you can disable these by clicking Inactive)